
Summary
This article dives into 'Sons of the Forest' from Eastern perspectives, revealing how gameplay elements resonate with deeper themes that can enrich players' experiences. Key Points:
- Explore Cave D's layout as a metaphor for the human psyche, reflecting Eastern philosophies of self-discovery and confronting inner demons.
- Analyze the Female Puffy Boss through an Eastern lens, highlighting its challenge to traditional gender roles and representation of female power.
- Examine the game's emphasis on harmony and balance in ecosystems, illustrating how player actions impact their environment and create consequences.
Cave D Exploration: Unlocking Hidden Treasures and Overcoming Obstacles
The exploration of Cave D presents a unique challenge for adventurers, offering both obstacles and hidden treasures. Navigating through the eastern entrance is crucial as it sets the stage for a successful journey within this complex underground environment. Players must be vigilant to avoid confrontations with the formidable female Puffy boss whose unpredictable movements can hinder progress.To enhance survival chances, acquiring a rifle early in the expedition is advisable; this weapon not only provides defense but also opens up additional strategic options for dealing with threats encountered along the way. As explorers delve deeper into Cave D, they will encounter various key areas rich in lore and resources.
Notable locations include murals depicting the history of this mysterious cave system adding depth to their narrative experience; additionally players may come across mutant babies and other intriguing entities inhabiting these depths while information regarding Fingers is available nearby which can offer insight into some more sinister aspects of this subterranean world.
Ultimately navigating Cave D requires not just skill but an appreciation for its intricate design and hidden secrets; The combination of combat readiness and exploration will lead to fulfilling adventures filled with discovery excitement.


To access Cave D, use the console command "goto 980 245 -402". Upon executing this command, you'll find yourself at the location depicted in the screenshot below. This corresponds to Location #1 on the cave map.


To begin your adventure, head directly into the cave and follow the upward path lined with wooden planks, as illustrated in the accompanying image. Beneath this path, you'll find a wooden crate waiting for you. (Refer to Location #2 on the cave map.)


You will encounter wooden crates in two distinct spots. One is located at the bottom of the sloped road, and the other lies to your left as you proceed forward.


After navigating the narrow street depicted on the left, you'll encounter a vibrant mural shining brightly on the wall ahead. This is located at point #3 on the cave map.


As you continue, turn your gaze to the right, where you'll spot two mutant infants nestled in an open space. This location is marked as #4 on the cave map.

Head to location 4 marked by the green square, and you will find a 9mm ammo box positioned in front of the rock, as illustrated in the screenshot on the right below.


Defeating the Female Puffy Boss: Tactics and Strategies
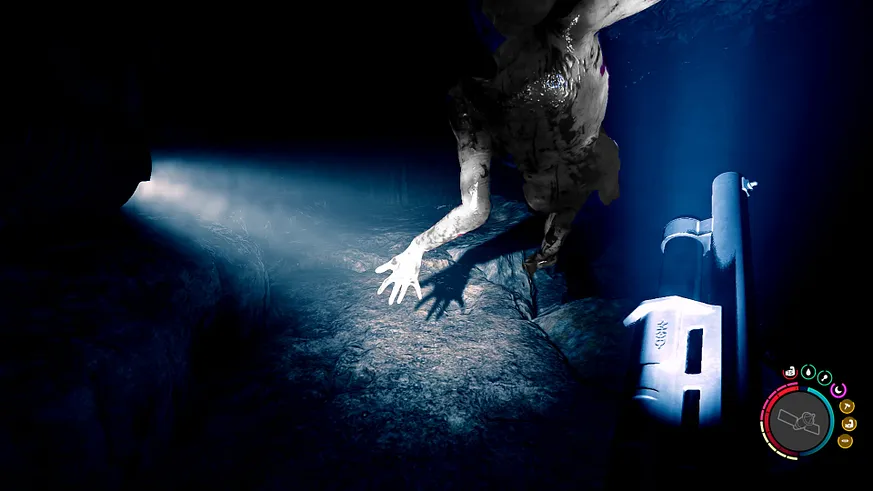
When facing the female Puffy Boss, players must pay special attention to its unique attack pattern. This enemy flies like a whirlwind and will collide violently before launching fierce attacks, making it crucial to move quickly to avoid being caught in its path. Additionally, the narrow passage at location 5 is the best place to handle the Puffy enemies. Here, when they fall, they can get stuck on rocks and end up walking in place, providing an advantage for players in battle.
Here are images showcasing the Puffy boss along with other Puffys located in the area highlighted by red hazard number 5.


To begin your journey, navigate towards location 7 and venture through the narrow corridor. Here, you will need to capture the puffies as they appear, typically one or two at a time. The dim lighting around you makes it impossible to use explosive arrows effectively. However, if you attach a torch to the wall, you will attract mutants who are drawn to even the faintest glimmer of light.

If the mutants don't approach you swiftly, they are likely to dart between the rocks right in front of your position where you initially arrived. The green circle indicates my line of sight, while the red circle marks where the puffies are stationary.


The Puffy Boss is very annoying because it rotates frequently and makes flying attacks (tornado attacks?). Attacks like the ones below can be made from the bottom up, right in front of you, and frequently anyway.
After successfully defeating this group, players will come across a live bridge located in an area reminiscent of the dog boss's lair. In Position 6 described below, there is one head, two arms, and one leg present. To bring the water level up to the surface, it requires a total of seven dives.

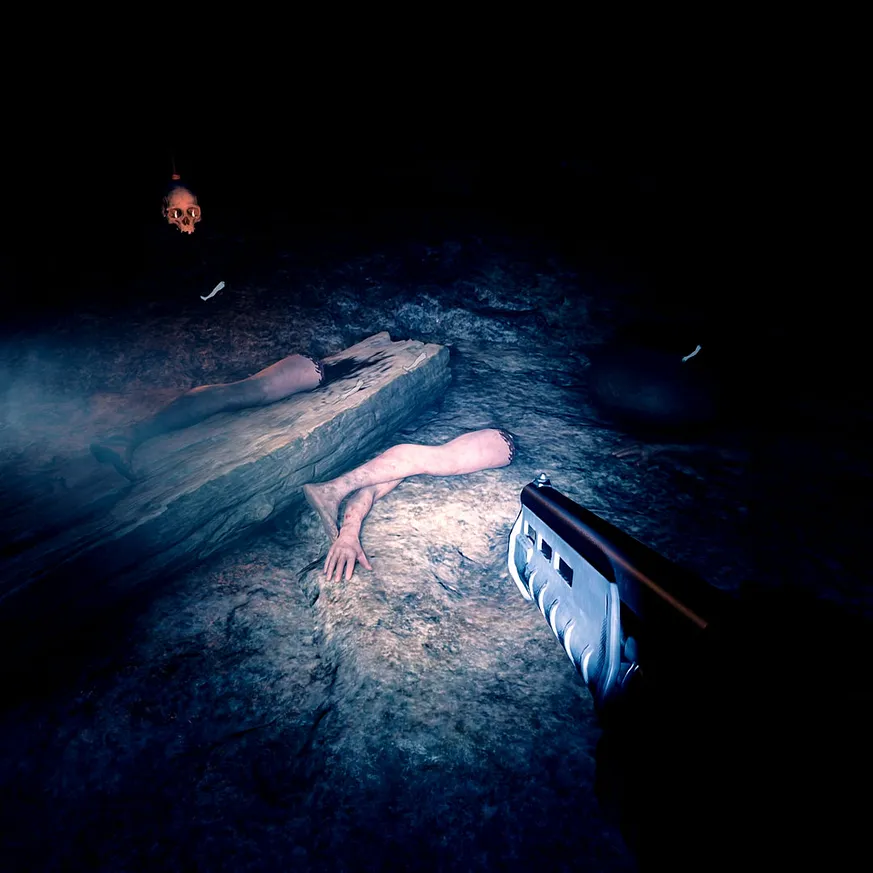
With these ingredients, you can create a dish known as "Greg."

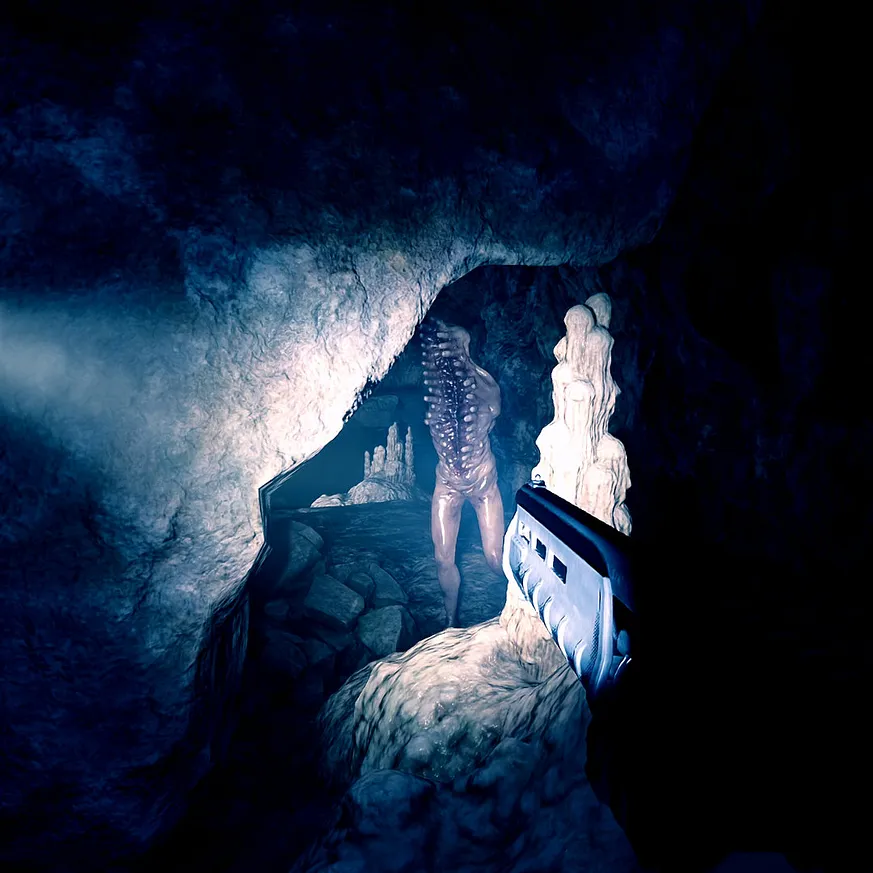
If you follow the path indicated by the arrow starting from location 6, you'll arrive at a spot where you can dive and resurface at location 7. You might encounter a lone Fingers in this area or not. Later on, to avoid being ambushed from behind upon your arrival, simply discharge a firearm, and you'll soon see Fingers appear shortly after.

If you manage to defeat Fingers at this location, upon reaching location 8, you will notice Fingers submerged in the water as depicted in the screenshot below.

If you refer to the area highlighted in red on the map below, you'll find the current location of Solafite ore.


By utilizing a pickaxe to mine the ore at this location, you'll reveal an entrance depicted in the accompanying screenshot.

If you venture beneath the location of the solarite vein,

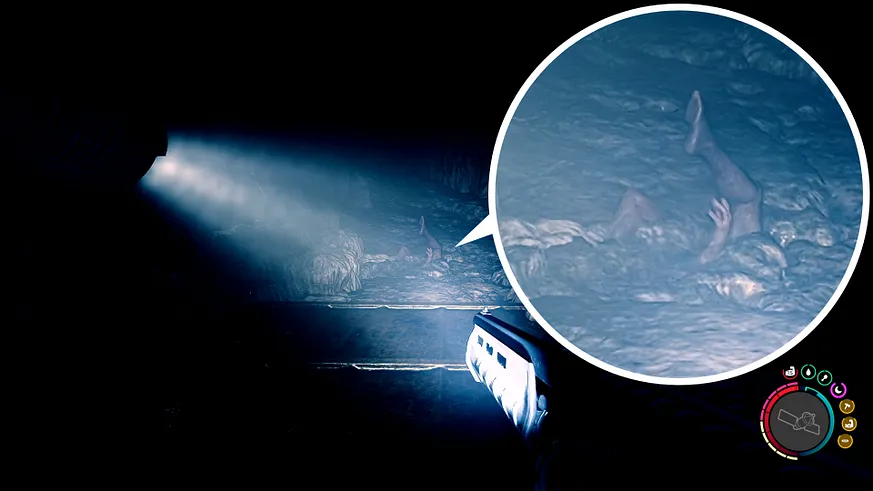
When you navigate through the diving section depicted below, keeping your eyes on the ceiling will guide you safely along your path. After passing beneath the area where a skull is suspended and the section with floating limbs, you'll soon find yourself emerging from the water.


If you arrive here without having defeated Fingers at location 6, you'll find yourself ambushed by Fingers as soon as you emerge from the water, just like in the screenshot below.

This location also has a grenade and an air tank positioned in front of your teammate's corpse.

If Fingers isn't at this location, you may encounter him on the way.

From position 9, you can clearly see Fingers across from you... Strangely, if you fire a shotgun here, it doesn't hit you but rather bounces off the wall as if you were shooting at it.}
{At position 9, Fingers is distinctly visible right in front of you. Interestingly, when you pull the trigger on a shotgun in this spot, instead of hitting your target directly, the shot ricochets off the wall as though it was aimed at that surface instead.
As depicted in the screenshot below, there exists an invisible barrier at the spot marked with an X. The highlighted region is unobstructed. Remarkably, if you simply stand in this area, Fingers remains completely unaware of your presence.

As soon as you start shooting, the nearby two mutant babies will hear the sound and come over.

There are also ingredients for a dish called "Greg" here.

In the screenshot below, a rifle is prominently displayed. Additionally, you will notice energy drinks and MRE packs situated next to the bodies of your teammates.

If you navigate to location 11 on the map, you'll discover an area inhabited by four mutant infants, along with a rope that ascends upwards.


As you navigate through the corridor adorned with golden walls, as depicted in the screenshot below (Location #12 on the cave map)

A creature known as Legsy will emerge from the earth. To take it down, consider using a shotgun. If you find yourself short on ammunition, simply enter "additem 364" in the console command to receive 1,000 shotgun shells. For slug bullets, use code 363. To acquire 9mm ammunition, the command is "additem 9mmammo."

There are two Puffies located at point 13 on the map. When engaging a Puffy with a shotgun, it's advisable to position yourself directly in front of it and aim for its head. If this isn't feasible, be aware that the mutant can rise again 3 to 4 times after being struck by your shotgun blast.

Begin by breaking the wooden plank directly in front of you, then hop onto the slide to make your way to the heart of the cave. (Refer to location #14 on your cave map.)


 ALL
ALL
Discussions